DIYguru presents the three-week certification program on Electric Bike & Four Wheeler Virtual prototype design course using Solidworks, now with 4-6 weeks of additional internship-based project learning! You will be learning how to make 3D models, 2D engineering drawing, assembly, animation, and high-quality 2-Wheeler and 4-Wheeler Electric Vehicle in SolidWorks.

Our Alumni’s works in

Programs Accredited by Govt. Bodies

Overview

Prototypes can be individual parts or complete cars, and once they’re built, they can be put through their paces to see how well they do and, in some cases, tested to destruction if necessary. Traditional prototyping was a slow and expensive process because, even with the best engineers, theory wasn’t always borne out in practice. The constant back and forth between drawing board and prototypes was costly and enormously time-consuming. Computer-aided design (CAD) and computer-aided engineering (CAE) for designing and simulating the performance of products changed things entirely, with the inevitable consequence that cars can now be engineered, prototyped and tested in a virtual world before any physical prototypes are built. Manufacturers can get closer than ever before to the finished result before prototypes roll into a wind tunnel or onto a test track.

Program Objective

             The course deals with the creating and designing parts, assembling models and product development using Solidworks. It goes through a complete walkaround of the software user interface, tools, commands and operations to enhance your skill as CAD Design Engineer              The course starts with basic introduction of software and its implementation and application in various fields and industries. The course is focused on complete automobile product development from the initial sketch to final assembly. The course will optimise your skills and will make you competent for Solidworks Associate (CSWA) and Solidworks Professional (CSWP) certification exams. The first module covers the designing of an electric scooter starting with the development of chassis design on a two dimensional sketch with considering vehicle parameters. Then adding structural members to the 3D sketch or a wireframe design of the chassis. The next videos cover the braking subsystem, suspension system and powertrain designing. The final videos consist of assembling the design parts in bottom down assembly configuration and rendering the final product.             The Electric Car module covers the design and development of an electric sedan. The videos starts with the phase of chassis development, suspension system, steering system, braking, powertrain and drivetrain. All the vehicle parts of subsystems are designed individually and then assembled to form the subassembly. The latter also include designing of a monocoque chassis using surface and solid modelling. The complete outlook of the vehicle including the interiors is modelled using surface design. The subassemblies are assembled using constraints and configurations in Assembly mode of Solidworks. The vehicle is featured with exploded view and animation with rendering. The course also includes chain sprocket design with Assembly in Solidworks.             DIYguru course also offers BAJA and FSAE vehicle development modules for SAE event preparations which will aid the students for their competitions and upskilling them in their team. The modules cover the required design and simulation according to the rulebook parameters using Solidworks.

With Project-based 1-month Internship Learning!

Stepwise procedure for the course enrollment with a 4-week internship project

  • Step 1: Apply for the internship-based learning-based course.
  • Step 2: Pay the necessary fee to enroll in the program.
  • Step 3: The technical team of DIYuru will check your entered data, and will share the confirmation of acceptance as you will be shortlisted in the next 24 hours.
  • Step 4: Once you are enrolled in the course, start working on the course videos, and given assignments, and complete the course at your own learning pace! With this, you shall receive the ‘course completion’ certificate.

Project-based Internship process

  • Step 5: If you have applied for the ‘internship-based learning’, then the team DIYguru Support shall connect with you to share the date of the ‘live course certification examination!’. This examination will enable you to understand your current expertise and will allow us to define the best possible project for you! Students will get a minimum of 4 weeks for the examination preparation.
  • Step 6: Once you clear the examination, the DIYguru technical mentors will contact you to enroll you in the ‘live project’. Since students will work on a live project, students will get enough time to prepare themselves before the internship project begins.
  • Step 7: Since it is an ‘internship’ based project, the students will be encouraged to work through the assigned project in teams and will be allowed to achieve the results on their own, with mentorship support from DIYguru! Allowing you to gain the actual skills as an ‘intern’! Enrolled students will get a minimum of 4-6 weeks to work and submit their project reports.
    • DIYguru shall also allow you to work in groups or as an individual. However, at the end of the internship, each student shall submit a project report with all the results achieved, for evaluation by the DIYguru technical team.
    • Every candidate after successful completion of the internship project shall also submit a pitch presentation video, explaining his/her project-oriented achievements and results, so that the participants can work on their communication and presentational skills simultaneously. With this, you shall receive the ‘Project-based internship’ certificate (along with evaluation score), and an ‘achievement badge’ to validate that you have successfully cleared the ‘certification examination’ (shareable on LinkedIn and other platforms).

Application Form

[gravityform id="16" title="false" description="false" ajax="true"]

Learning Outcomes

  1. Demonstrate competency with multiple drawing and modification commands in SOLIDWORKS.
  2. Create three-dimensional solid models.
  3. Create three-dimensional assemblies incorporating multiple solid models.
  4. Apply industry standards in the preparation of technical mechanical drawings.
  5. Create Simulation of the assemblies incorporating multiple solid models.

Main Highlights

  1. Learn without a career break with online classes available 24*7.
  2. One can access the course at their own pace, but with the investment of 3-5 hours/week, it can be finished within a month.
  3. The program uses a Continuous Evaluation System that assesses the learners over convenient and regular intervals. Such a system provides timely and frequent feedback and helps busy working professionals stay on course with the program.
  4. The education delivery method is a blend of classroom and experiential learning.
  5. Participants who will complete the program become eligible for Mentorship and Placement help through our Job Fairs.
  6. This program is focused on student-level competitions like SAE BAJA, SAE SUPRA, and even Formula Bharat and Formula-E.

Eligibility Criteria

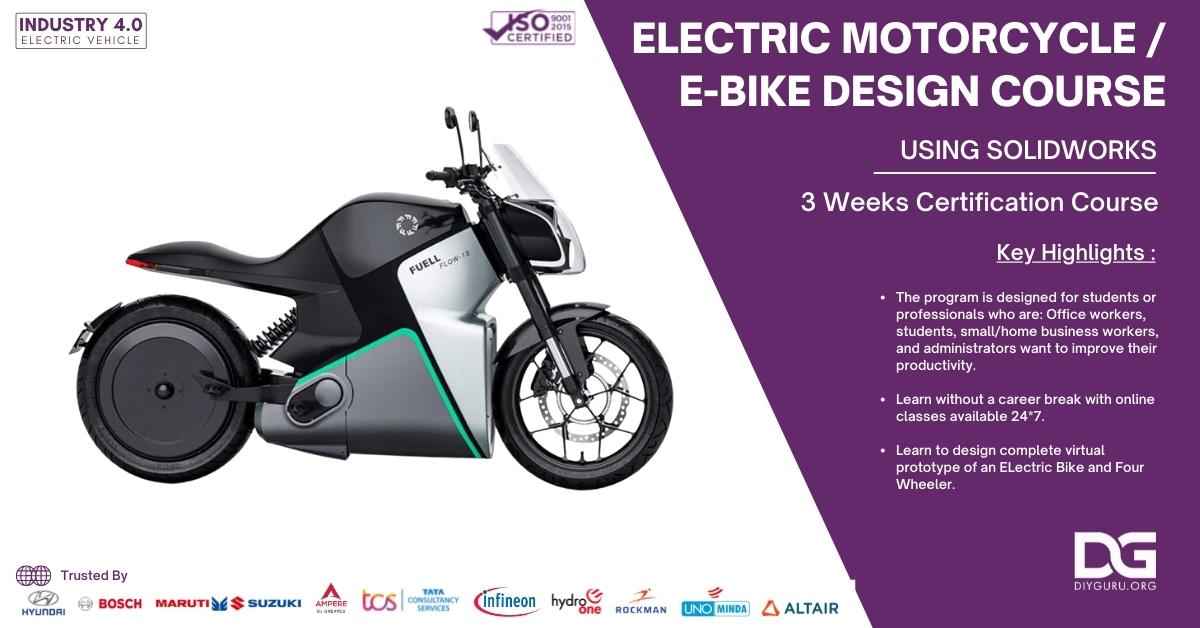
The program is designed for students or professionals who are:

  1. Having a Diploma, BE / B.Tech or equivalent in domains such as Automotive, Mechanical, EEE, ECE, Instrumentation, Mechatronics.
  2. Designing enthusiasts (No academic qualification mandatory)
  3. Working in industries such as Automotive, Auto component, Design, Manufacturing, etc.
  4. Working in Functional areas such as R&D, Analysis, Maintenance, Projects, component design, etc.
  5. Interested in pursuing further studies on the part-time or full-time basis in Design and Engineering Sector.

Technical Requirements

The program to give its best will need the following requirements:

  1. Computer/ Laptop will provide you with the best experience, but this program is quite compatible with smartphones to make it feasible for students worldwide.
  2. High-speed internet for crystal clear experience, but this program can also run without buffering with below-average connectivity for reaching out to students from suburban and rural areas.
  3. A student should make their notes for future reference.
  4. A student should have basic knowledge about high-school physics, maths, and chemistry, even though the pre-requisite of this program will brush up one's basic concepts.
  5. A student should have a compatible computer for SOLIDWORKS CAD software so that they can practice with the progress of the course.


Competency Certificate 

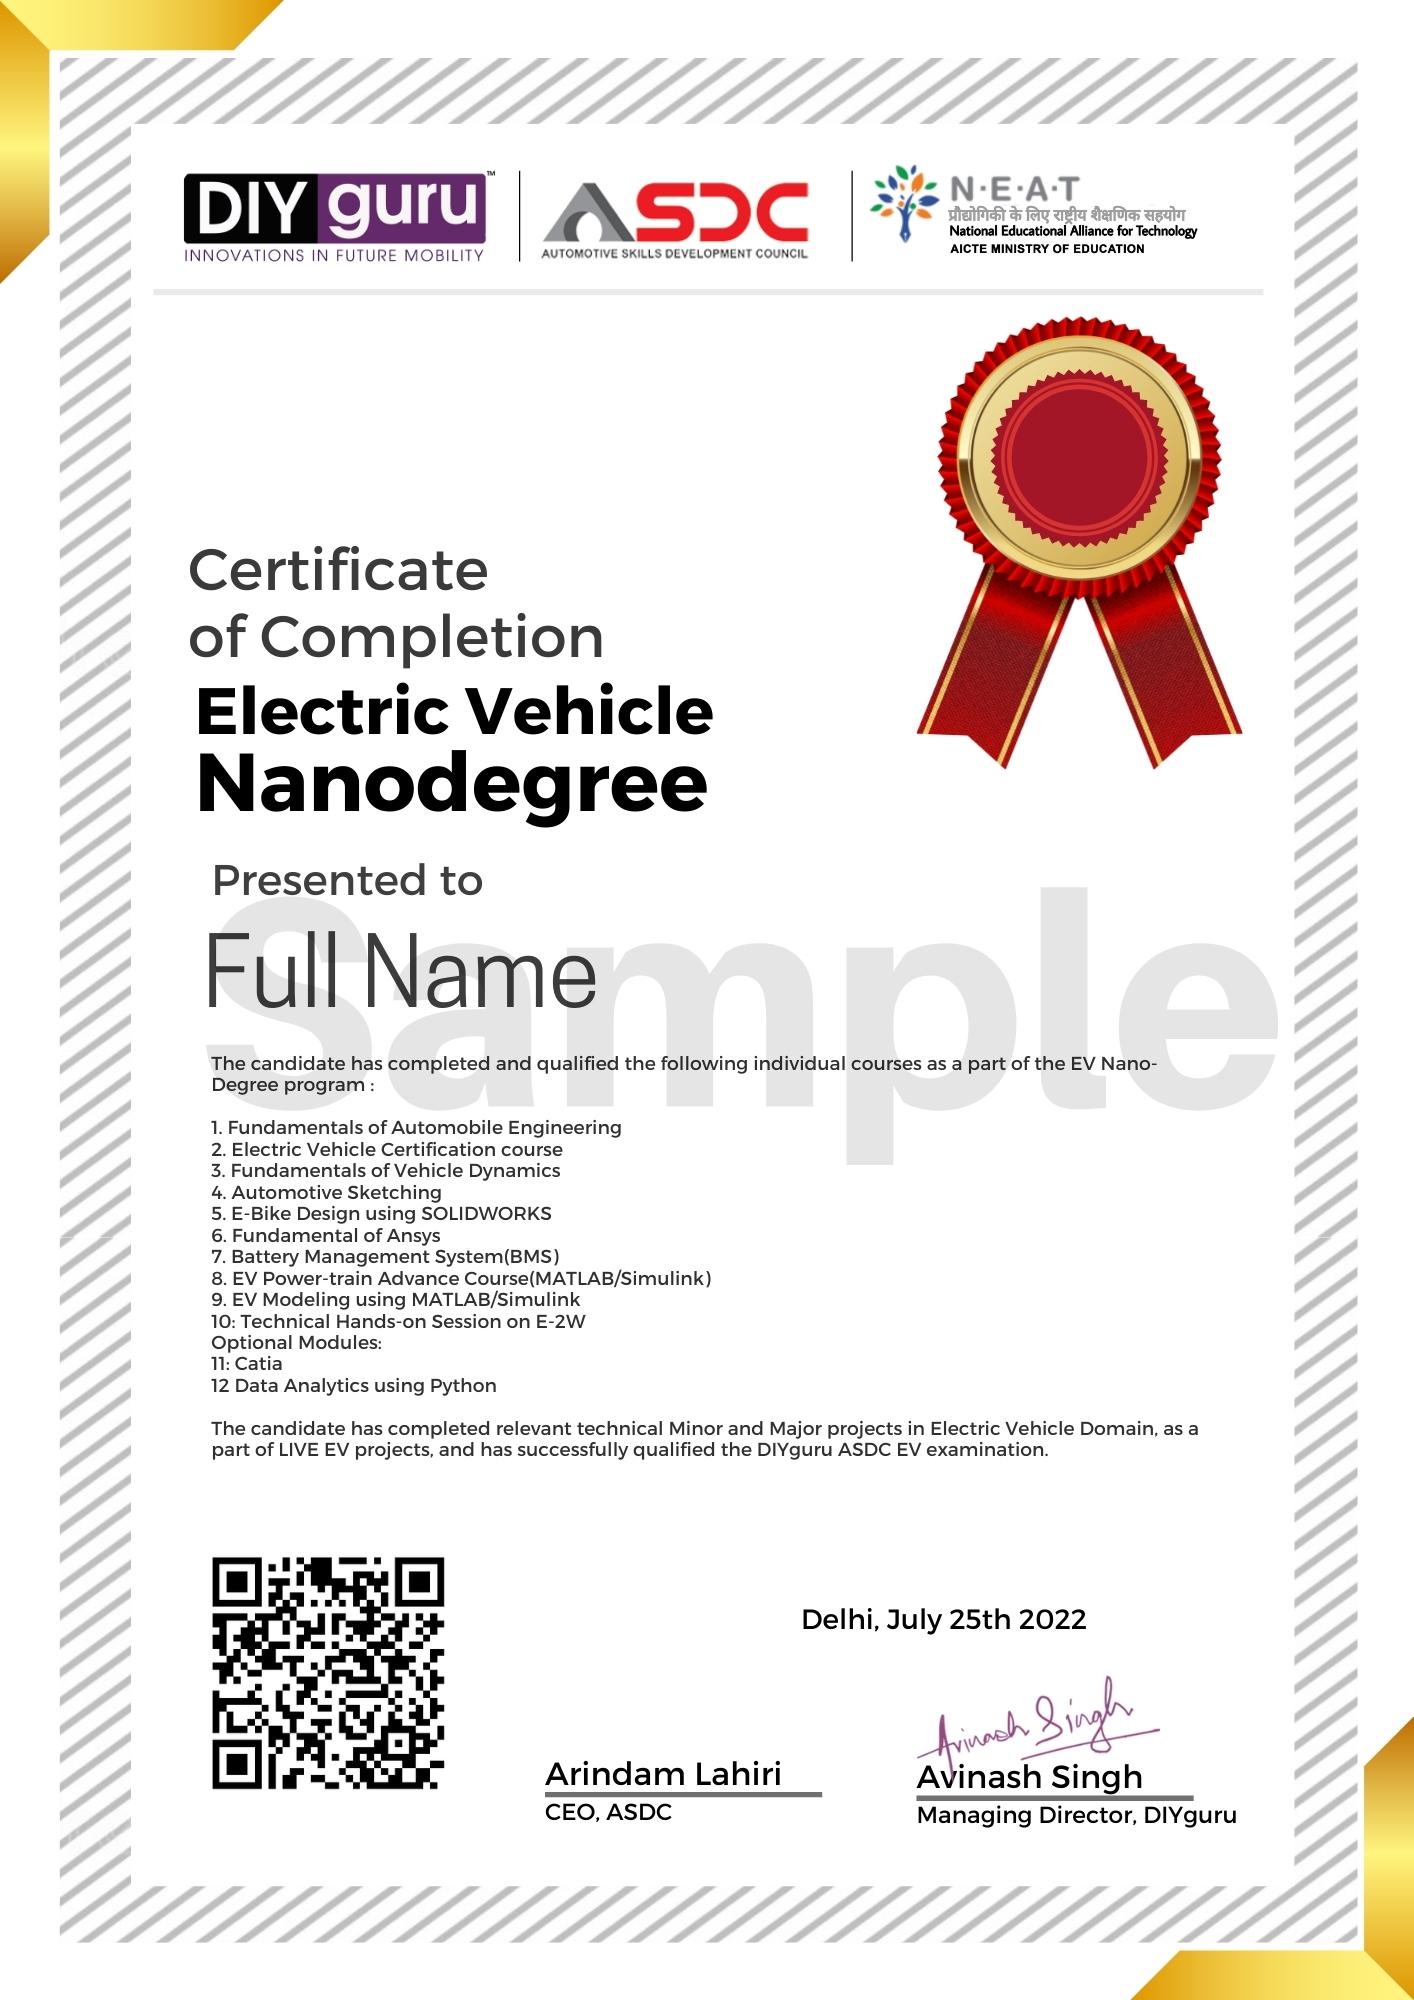
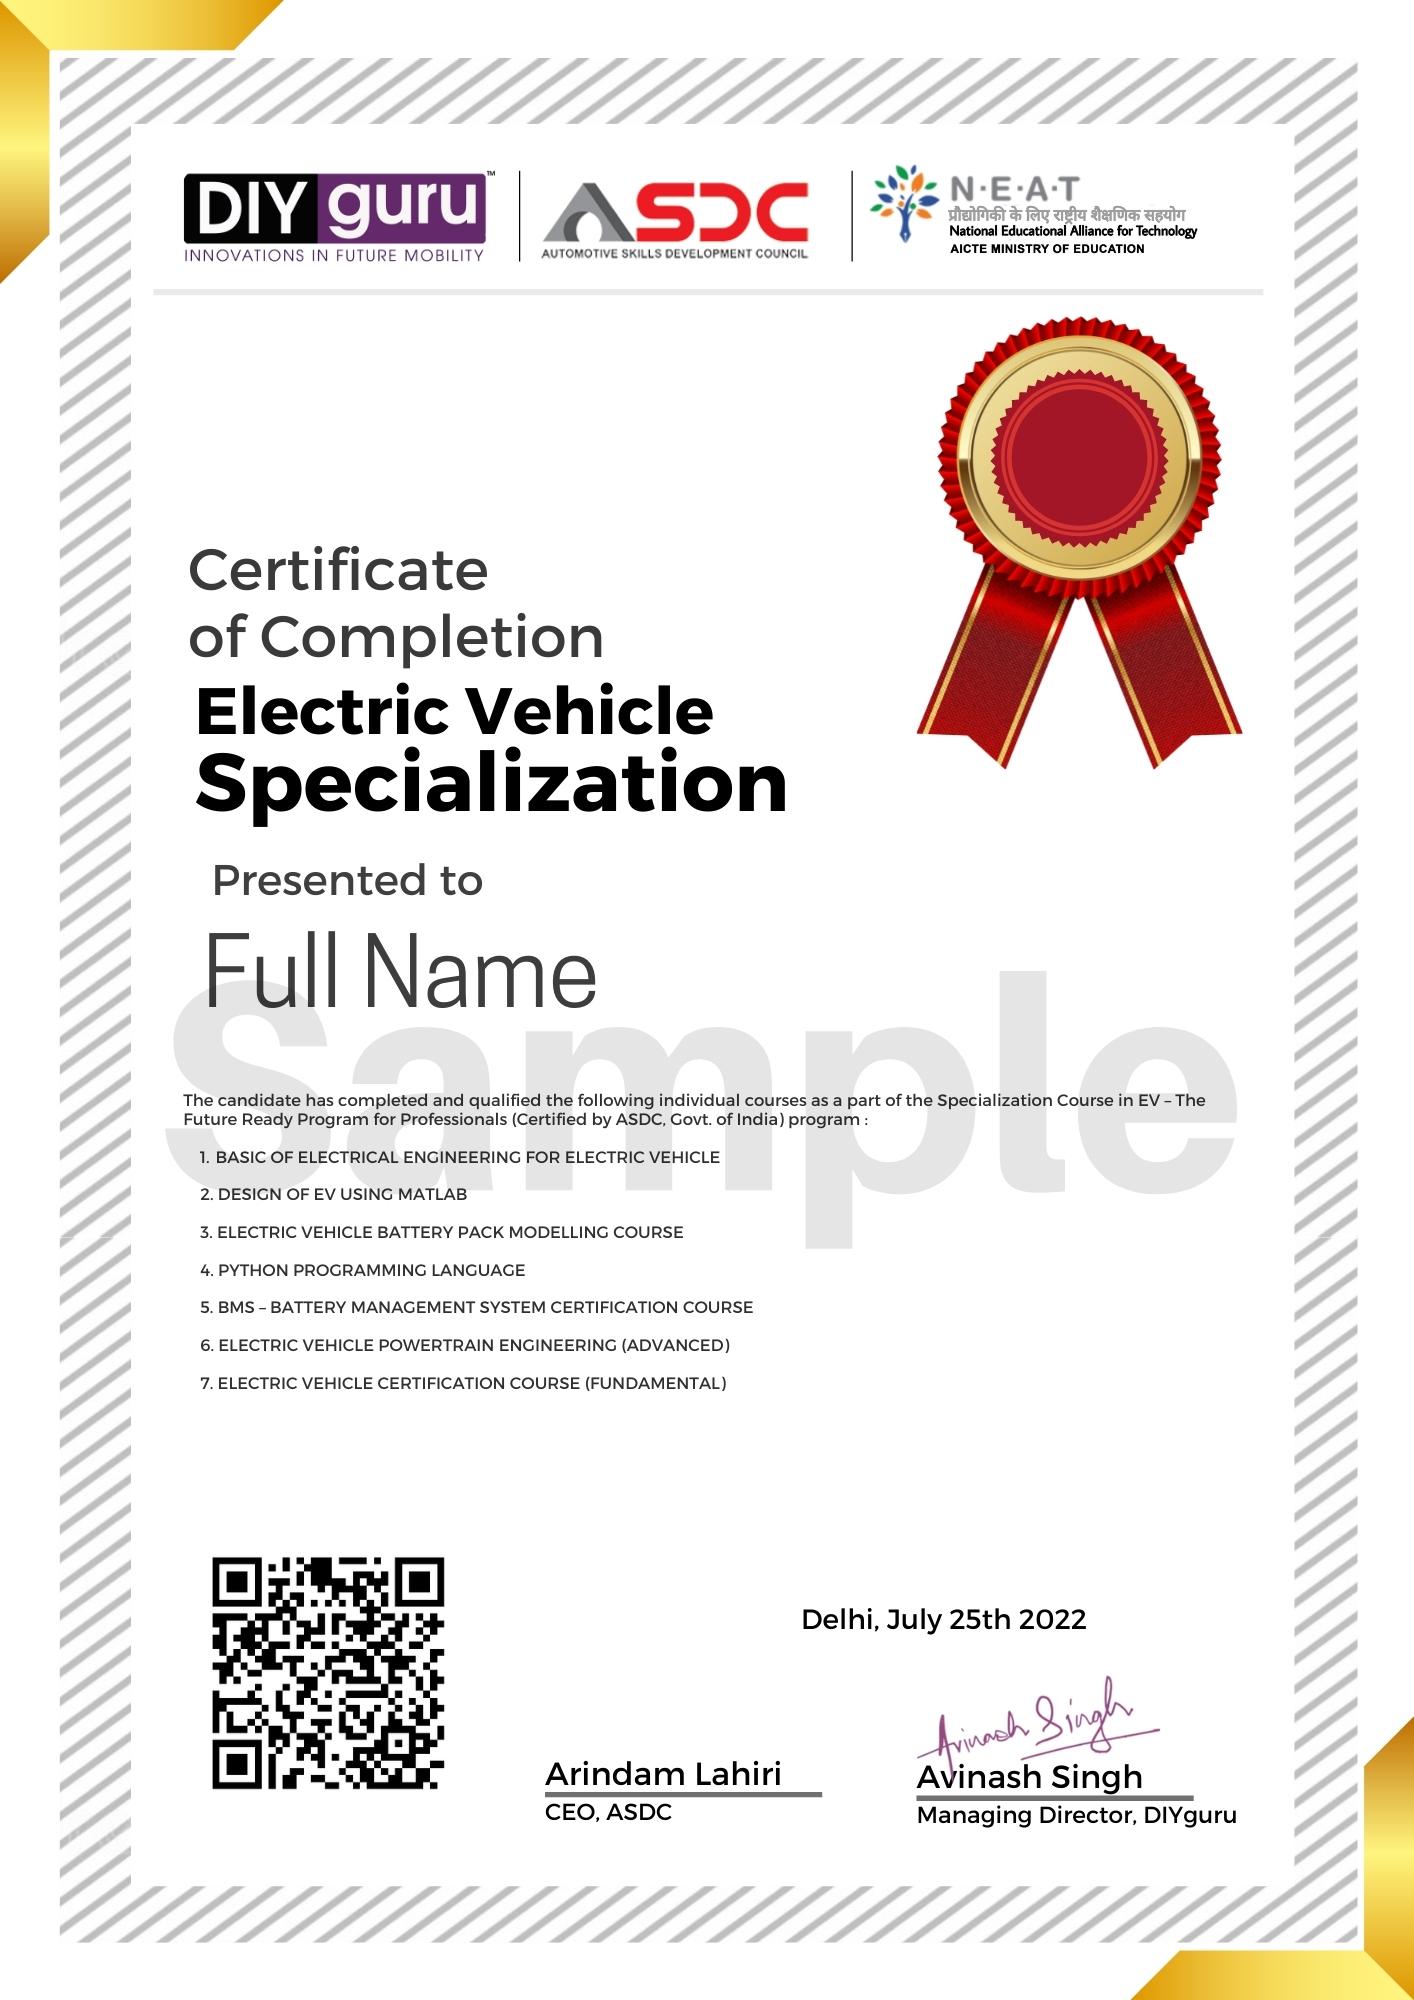
DIYguru will feel proud to awards the certificate of competency in 'SOLIDWORKS - Design, Drafting and Simulation' to only those aspirants who have 100% completed their online module.

DIYguru proficiency Certificate is highly valuable by industry giants namely Robert Bosch; Maruti Suzuki; Hyundai Motors, are the name of few, which is why DIYguru earned certificates are secured with a unique certificate ID. To check the validation of the certificate, check out the footer section of the home page.   

Certificate provided to you is an online certificate, which means there is no need to download, after completion of the course, aspirants are requested to check their profile to view their earned certificate. In case the certificate is not issued feel free to write us a certificate@diyguru.org, our team will help you out.


Nanodegree Sample Certificate
Specialisation Sample Certificate


Course Curriculum

  • INTRODUCTION TO CAD 00:00:00
  • SolidWorks interface 00:00:00
  • Sketching toolbar part 1 00:00:00
  • Sketching toolbar part 2 00:00:00
  • Boss_base extrude. 00:00:00
  • 3d Features. 00:00:00
  • Basic CAD example part 1. 00:00:00
  • Basic CAD example part 2. 00:00:00
  • Revolve boss_base example. 00:00:00
  • Lofted boss_base example. 00:00:00
  • CAD example. 00:00:00
  • Assignment: SLDW1 2 weeks, 6 days
    • Introduction to Solidworks 00:00:00
    • Two Wheeler Chassis Part 1 00:00:00
    • 3. Two wheeler chassis part 2 00:00:00
    • 4. Rear shock absorber part 1 00:00:00
    • 5. Rear shock absorber part 2 00:00:00
    • 6. Rear shock absorber part 3 00:00:00
    • 7. Swing arm scooter 00:00:00
    • 8. Two wheeler tyre 00:00:00
    • 9. Two wheeler alloy wheel 00:00:00
    • 10. Front suspension Scooter 00:00:00
    • 11. Disc brake rotor Scooter 00:00:00
    • 12. Hub motor part 1 00:00:00
    • 13. Hub motor part 2 00:00:00
    • 14. Hub motor part 3 00:00:00
    • 15. Motor controller scooter 00:00:00
    • 16. Handle bar scooter 00:00:00
    • 17. Scooter Assembly part 1 00:00:00
    • 18. Scooter Assembly part 2 00:00:00
    • 19-Front Panel Scooter 00:00:00
    • 20. Scooter Headlight 00:00:00
    • 21.Front mudguard 00:00:00
    • 22.Middle body panel part1 00:00:00
    • 23.Middle body panel part 2 00:00:00
    • 24.Rear body panel scooter 00:00:00
    • 25.Taillight 00:00:00
    • 26.Swing arm panel 00:00:00
    • 27.Modified taillight 00:00:00
    • 28.Editing scooter mask 00:00:00
    • 29.Final assembly scooter 00:00:00
    • 1. Car chassis part 1 00:00:00
    • 2. Car chassis part 2 00:00:00
    • 3. Car chassis part 3 00:00:00
    • 4. Car tyre part 1 00:00:00
    • 5. Car tyre part 2 00:00:00
    • 6. Car brake rotor 00:00:00
    • 7. Steering Knuckle part 1 00:00:00
    • 8. Steering Knuckle part 2 00:00:00
    • 9. Steering Knuckle part 3 00:00:00
    • 10. Front Suspension Macpharson part 1 00:00:00
    • 11. Front Suspension Macpharson part 2 00:00:00
    • 12. Lower control arm part 1 00:00:00
    • 13. Lower control arm part 2 00:00:00
    • 14. Torsion Beam part 1 00:00:00
    • 15. Torsion Beam part 2 00:00:00
    • 16. Powertrain part 1 00:00:00
    • 17. Powertrain part 2 00:00:00
    • EV 3-Wheeler introduction. 00:00:00
    • EV 3-Wheeler skteching commands prerequisite. 00:00:00
    • EV 3-Wheeler 3d commands prerequiste. 00:00:00
    • EV 3-Wheeler Chassis part 1. 00:00:00
    • EV 3-Wheeler Chassis part 2. 00:00:00
    • EV 3-Wheeler Chassis part 3. 00:00:00
    • EV 3-Wheeler Chassis part 4. 00:00:00
    • EV 3-Wheeler Chassis part 5. 00:00:00
    • EV 3-Wheeler Chassis part 6. 00:00:00
    • EV 3-Wheeler Chassis part 7. 00:00:00
    • EV 3-Wheeler Tyre. 00:00:00
    • EV 3-Wheeler Tyre part 2. 00:00:00
    • EV 3-Wheeler Shock absorber and brake. 00:00:00
    • EV 3-Wheeler Motor. 00:00:00
    • EV 3-Wheeler Assembly 1. 00:00:00
    • EV 3-Wheeler Assembly 2. 00:00:00
    • EV 3-Wheeler Assembly 3. 00:00:00
    • EV 3-Wheeler Assembly 4. 00:00:00
    • SDBJ3 : Customizing SolidWorks for BAJA FREE 00:08:00
    • SDFS2 – Modeling an FSAE Frame 00:06:49
    • SDFS3 – 3D Content Central SolidWorks Models for FSAE 00:04:54
    • SDFS4 :FSAE Steering Assembly with Edit Component 00:07:25
    • SDFS5 : FSAE Design Analysis Apps Intro to FEA FREE 00:05:19
    • SDFS6 : SimulationXpress Sheet Metal Bracket 00:06:34
    • SDFS7 : Stress Analysis of FSAE Spindle Upright SolidWorks Simulation 00:05:06
    • SDFS8 : FSAE Tires and Wheels 00:07:05
    • Module 2: Quiz1 00:10:00
    • SDFS9 : FSAE Tutorial Frame drawing cutlist flat pattern 00:05:33
    • SDFS10 : Analyzing a Frame in SolidWorks Simulation 00:05:13
    • SDFS11 : Modeling an FSAE Frame 00:06:49
    • SDFS13 : Modeling a FSAE Frame Part 2 00:05:08
    • Geometric Dimensioning and Tolerancing 00:00:00
    • 18. Half shaft part 1 00:00:00
    • 19. Half shaft part 2 00:00:00
    • 20. Steering assembly 00:00:00
    • 21. Rack bar 00:00:00
    • 22. Steering boot 00:00:00
    • 23. Tie rod 00:00:00
    • 24. Tie rod end 00:00:00
    • 25. Pinion shaft 00:00:00
    • 26. Steering column upper 00:00:00
    • 27. Steering Column lower 00:00:00
    • 28. Car assembly part 1 00:00:00
    • 29. Car assembly part 2 00:00:00
    • 30. Car assembly part 3 00:00:00
    • 31. Car assembly part 4 00:00:00
    • 32. Car assembly part 5 00:00:00
    • 33. Car assembly part 6 00:00:00
    • 34. Car assembly part 7 00:00:00
    • 35. Monocoque part 1 00:00:00
    • 36. Monocoque part 2 00:00:00
    • 37. Monocoque part 3 00:00:00
    • 38-Front side Fenders 00:00:00
    • 39-Front bonet 00:00:00
    • 40-Front bumper part 1 00:00:00
    • 41-Front door panel 00:00:00
    • 42-Rear door panel 00:00:00
    • 43-car roof 00:00:00
    • 44-Exploded view and final rendering 00:00:00
    • Sprocket chain 00:00:00
    • Module1:Quiz1 00:10:00
    • Assignment:SLDW2 2 weeks, 6 days
    • SDFS14 : Creating Molds for FSAE Parts 00:09:37
    • SDFS15 : Fatigue Analysis on a FSAE Hub 00:07:35
    • SDFS16 : Design Optimization of a Formula SAE Hub 00:07:13
    • SDFS17 : Modeling a Formula SAE Suspension Spring 00:06:38
    • SDFS18 : Using PhotoView 360 to Render FSAE Parts 00:09:54
    • SDFS19 : Using SolidWorks Motion for Formula SAE 00:07:08
    • SDFS20 : Tips and Tricks for Formula SAE Students 00:05:56
    • SDFS21 : Surfacing to Create FSAE Body Work – Part 1 00:10:29
    • SDFS22 : Surfacing to Create FSAE Body Work – Part 2 00:07:24
    • SDFS23 : How to Model a Formula SAE Exhaust in SolidWorks 00:08:11
    • SDFS24 : SAE Thermal Stress 00:03:11
    • SDFS25 : SAE Intake Internal Flow 00:05:26
    • SDFS25 : SAE Intake Internal Flow 00:05:26
    • SDFS26 : SAE Mold Tutorial 00:04:28
    • SDFS27 : SAE Frame Analysis 00:04:30
    • Optimization in Solid Works 00:06:22
    • Roll Cage Design (CAD) 00:45:00
    • Roll Cage Design (CAD) – FSAE FREE 00:06:49
    • Basics of SolidWorks- Part 2 Introduction to 3D modeling 00:14:27
    • Applying Weldments in Solid Works 00:06:08
    • Suspension Solidworks Model 00:10:00
    • Solidworks Simulation- Static structural analysis of hub. 00:10:03
    • Module 2: Quiz 2 00:10:00
    • Assignment 2 days
    • Files Part-1 00:30:00